Showing posts with label Korean Side Dish. Show all posts

Friday, July 22, 2022

Nakji Muchim / Spicy Octopus Salad


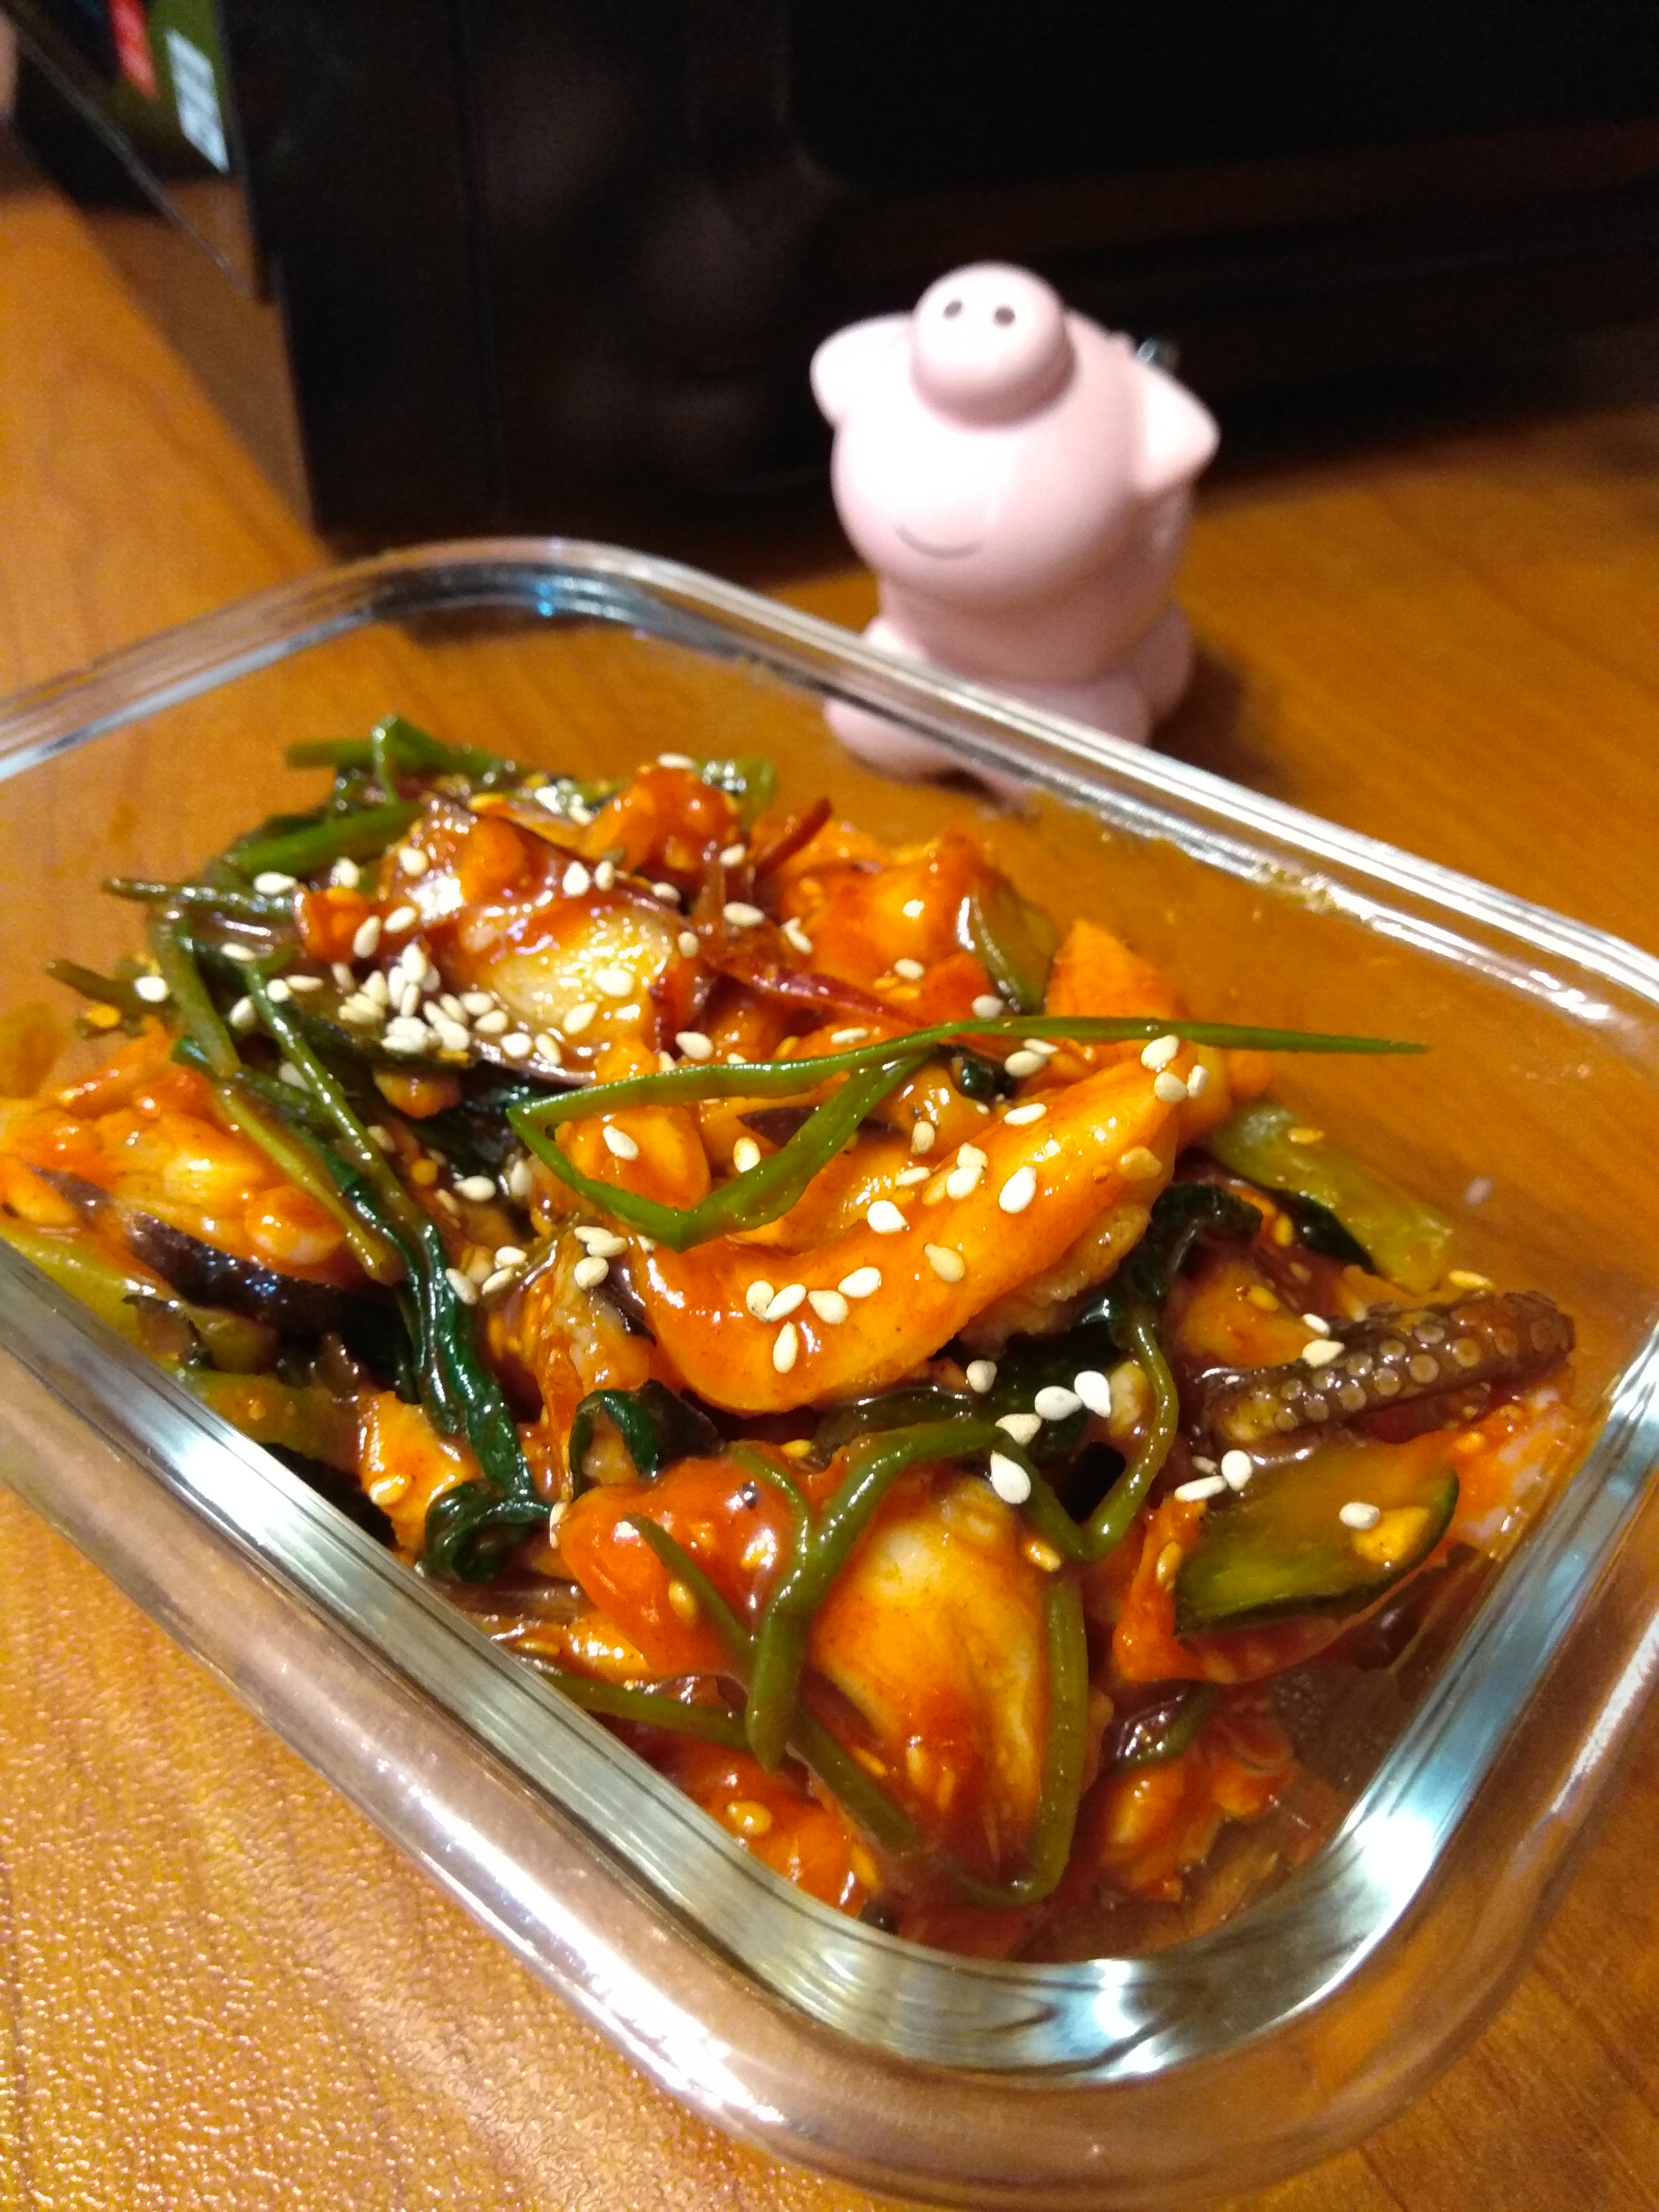
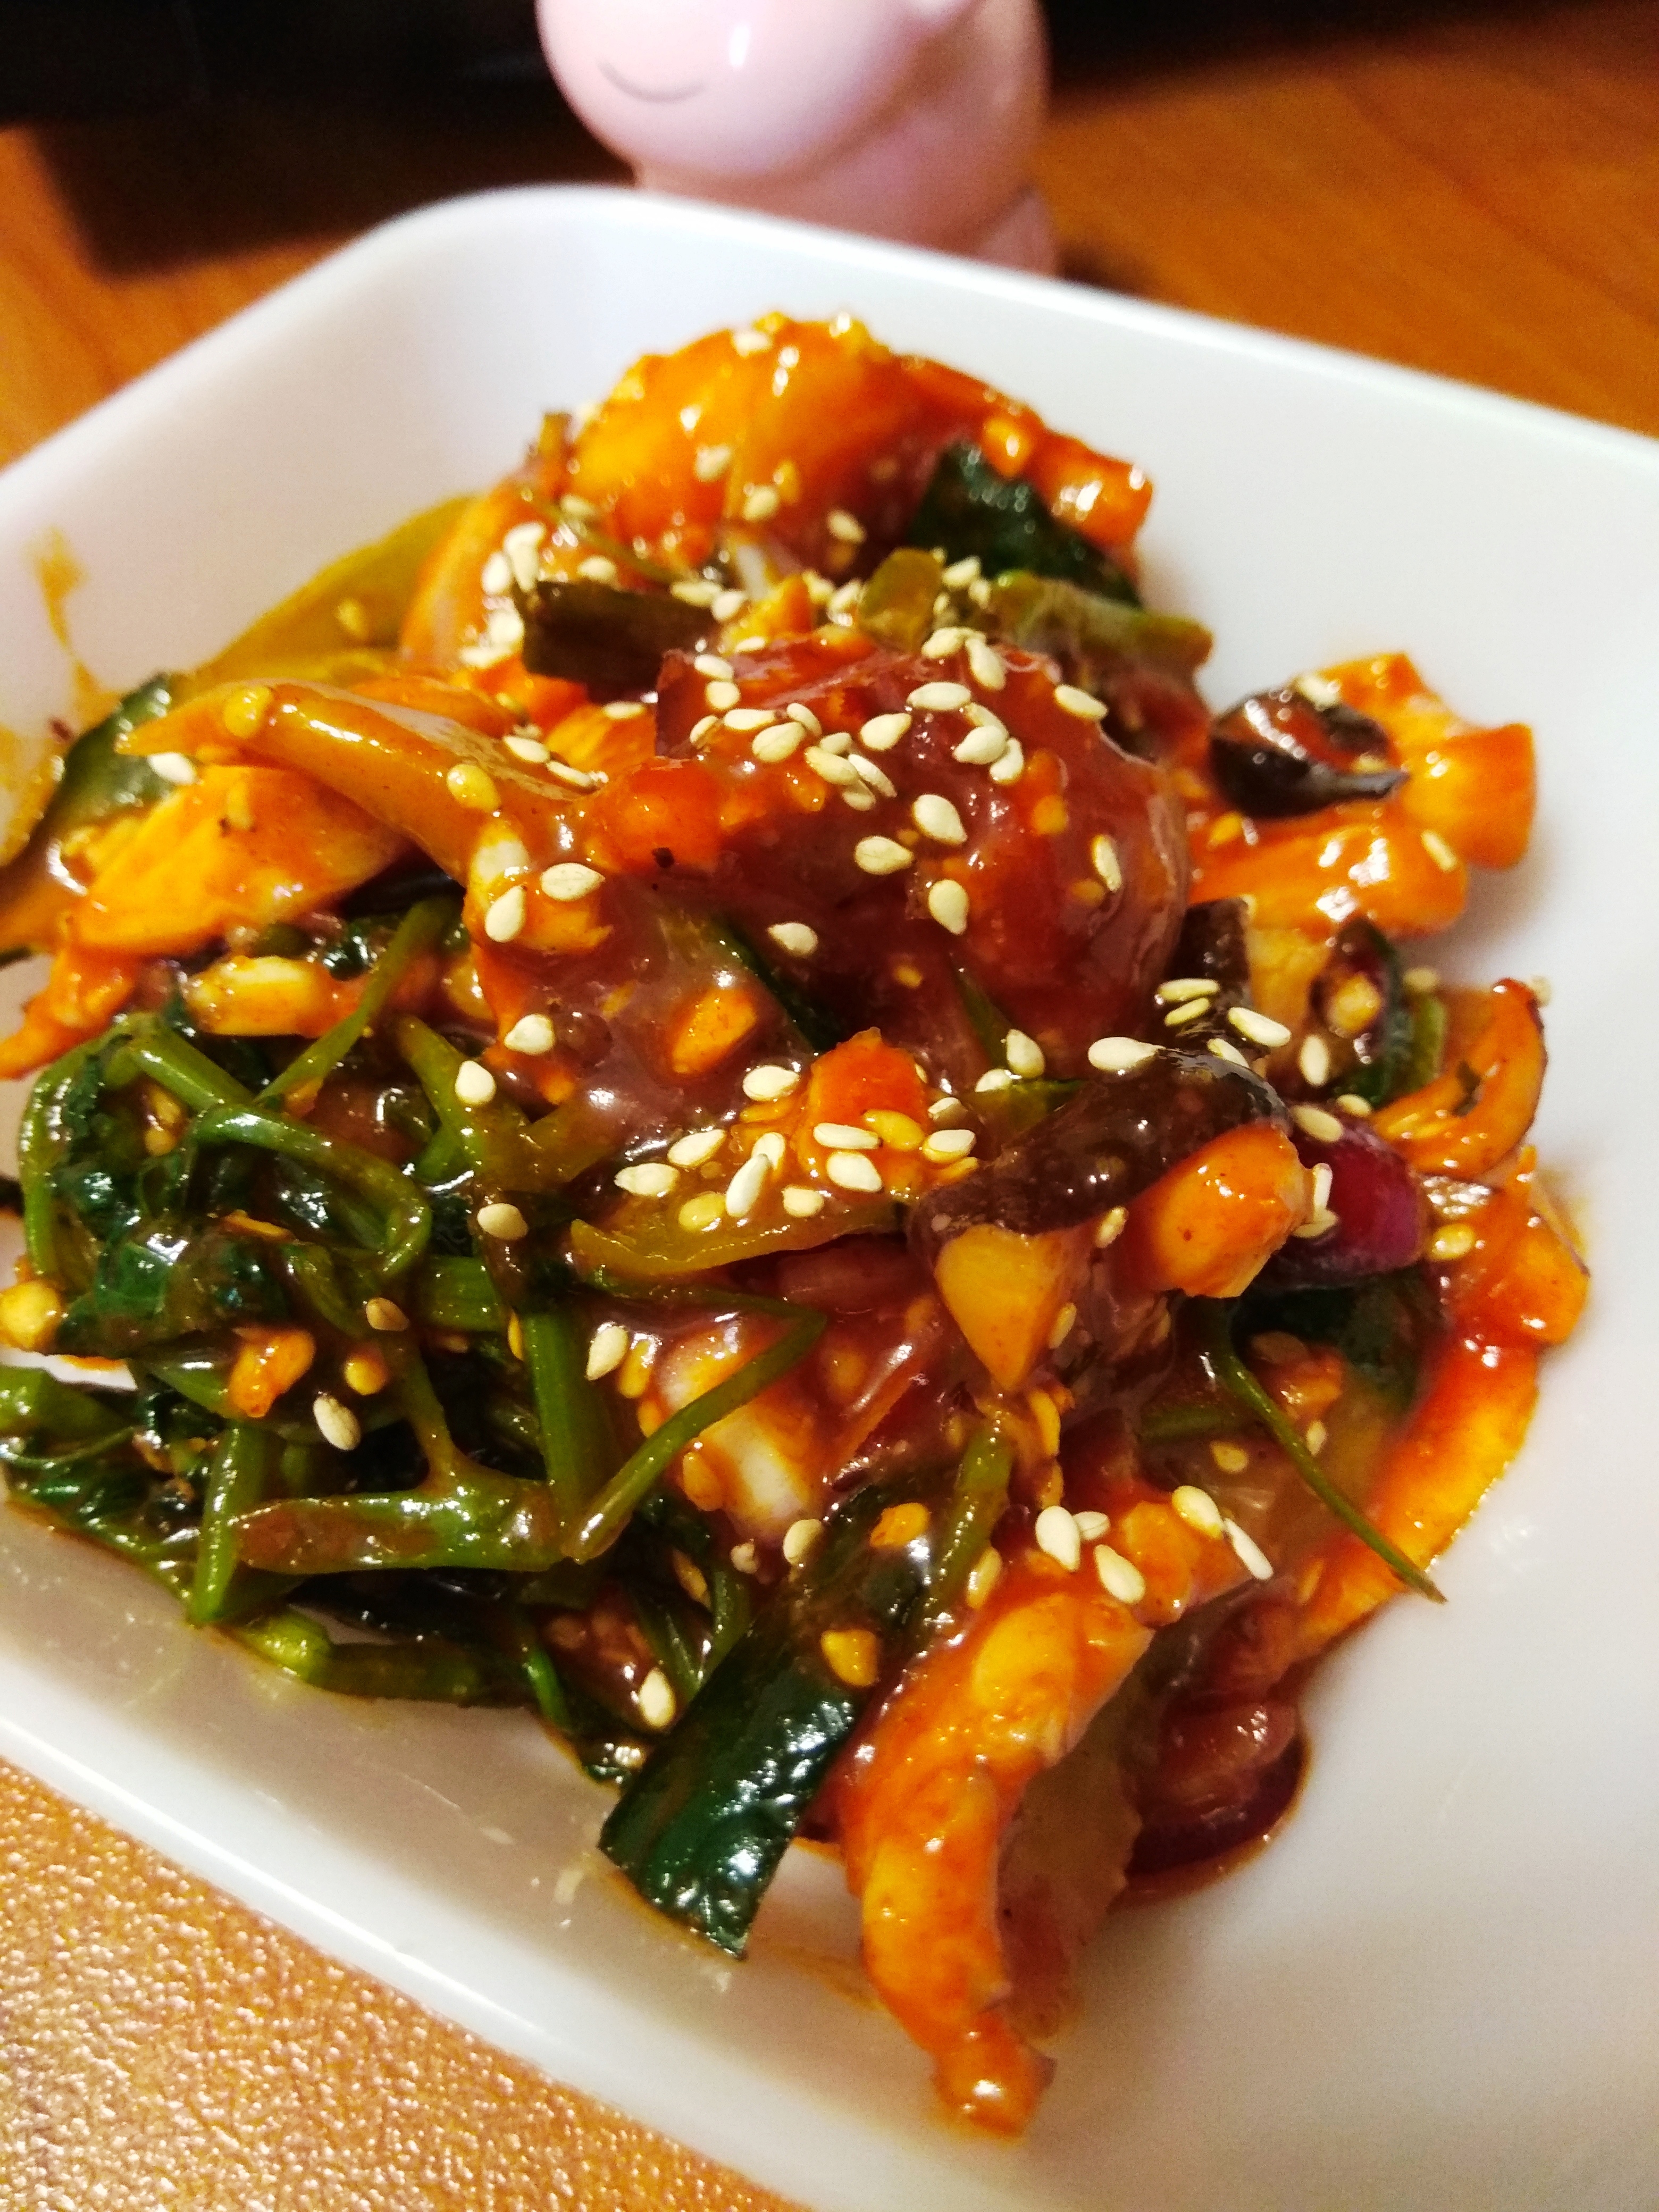
Been wanting to make this Nakji Muchim / Spicy Octopus Salad as a side dish. Korean called side dishes Banchan. I had bought a large frozen octopus from the Japanese shop when I went to buy the salmon fish some weeks . Grab some frozen Korean Oysters and NZ mussels too. I keep stock of them in my box freezer so that at any time I need seafood for my cooking, they are there for me. Lol ,I am like running a small restaurant but nope just keeping them for convenient sake. That's why it was a great thing that I had the octopus in the freezer for making this delicious Spicy Octopus Salad. I made a small portion as side dish. Seriously it tasted so good and we both love it . A keeper for sure! Recipe link is at the bottom of page. I used Korean Bapsang's Spicy Squid Salad. Except I used Octopus instead of Squid. And I added homegrown Water Spinach to the dish. So good that I will make this again for sure.
 easy to whip up and the taste is fantastic

spicy and the cucumber and water spinach adds crunch to the salad
boil the octopus first before slicing
and blanch the water spinach
We don't go wet market anymore
so frozen octopus will do for now
It is easy to put together the dressing for the salad
I have most of the basic korean sauce ingredients in my fridge as I cook Korean dishes very often

Recipe Link

Thursday, February 21, 2019

Gyeran Mari/Korean Egg Roll With Bonito Flakes


Cooking simple and yet delicious, this is it. Gyeran Mari, Korean egg roll which is fun to make and is attractive in outlook which appeals to both adults and children. When I run out of ideas what to cook for dinner, I will look through the recipes in my blog.  I spotted Gyeran Mari and thought it would be great to make this roll since I have some packets of bonito flakes and roasted seaweed after the Korean grill dinner. My food must not only look good to the eye but must taste good too. It is really fun to make this korean egg roll and I believe that practice makes perfect. This is my fourth time making it and I still needs to perfect my skill in making them as I tend to overcook the egg. I added bonito flakes for extra flavour.


you need a rectangle pan for making this korean egg roll


using a silicon spatula makes folding easier


practice makes perfect...


garnishes the top with bonito flakes
gives extra flavour to the egg roll


For the recipe, click  Gyeran Mari


Wednesday, January 17, 2018

Japchae 잡채 - Korean Sweet Potato Starch Noodles Stir Fry


Japchae is a very popular Korean dish and it is the most sought after dish during the Korean festive holidays ( New Year's Day and Harvest Day ) It is also enjoyed on any other common day as well.  As for me, I do make this whenever I feels the craving for it.  It can be served as a side dish or served on a bed of rice known as Japchae bap or as a main dish. The vegetables and meat are individually prepared, to some this might be cumbersome, I assure you it is ,but by preparing and cooking it individually , you can enhance  their dividual flavors , texture and color better as each has their own cooking point.  It is worth all the hardwork it entails.  I discovered recently that the secret in creating the authentic flavor of this dish is to find the right balance between the soy sauce and sugar.

I normally prepares a big portion as it can keep in the fridge for a day or two.  Hubby and I enjoyed this dish and having homegrown spring onions makes it even more special. It adds natural sweetness and fragrance to the dish.

 a bunch of homegrown spring onions 
adds sweetness and fragrance to the dish


cooking the meat and vegetables separately
enhances individual flavours , texture and color better


the secret in creating the authentic flavor of this dish is 
to find the right balance between the soy sauce and sugar.


I can never have enough of this dish and making a 
large portion is a must


Japchae 잡채 - adapted from Maangchi


Ingredients:-


4 ounces beef, filet mignon (or pork shoulder), cut into ¼ inch wide and 2½ inch long strips

2 large dried shiitake mushrooms, soaked in warm water for 2 to 3 hours, cut into thin strips

2 garlic cloves, minced

1 tablespoons plus 2 teaspoons sugar

2 tablespoons plus 1 teaspoon soy sauce

2 tablespoons sesame oil

1 tablespoon toasted sesame seeds

1 large egg

4 ounces spinach, washed and drained

4 ounces of dangmyeon (sweet potato starch noodles)

2 to 3 green onions, cut crosswise into 2 inch long pieces

1 medium onion (1 cup), sliced thinly

4 to 5 white mushrooms, sliced thinly

1 medium carrot (¾ cup), cut into matchsticks

½ red bell pepper, cut into thin strips (optional)

ground black pepper

salt

vegetable oil


Preparation:


Marinate the beef and mushrooms

Put the beef and shiitake mushrooms into a bowl and mix with 1 clove of minced garlic, 1 teaspoon sugar, ¼ teaspoon ground black pepper, 2 teaspoons soy sauce, and 1 teaspoon of sesame oil with a wooden spoon or by hand. Cover and keep it in the fridge

Make the egg garnish (jidan):

1. Crack the egg and separate the egg yolk from the egg white. Remove the white stringy stuff (chalaza) from the yolk. Beat in a pinch of salt with a fork.

2. Add 1 teaspoon of vegetable oil to a heated nonstick pan. Swirl the oil around so it covers the pan, and then wipe off the excess heated oil with a kitchen towel so only a thin layer remains on the pan.

3. To keep the jidan as yellow as possible, turn off the heat and pour the egg yolk mixture into the pan. Tilt it around so the mixture spreads thinly. Let it cook using the remaining heat in the pan for about 1 minute. Flip it over and let it sit on the pan for 1 more minute.

4. Let it cool and slice into thin strips

Prepare the noodles and vegetables:

1. Bring a large pot of water to a boil. Add the spinach and blanch for 30 seconds to 1 minute, then take it out with a slotted spoon or strainer. Let the water keep boiling to cook the noodles.

2. Rinse the spinach in cold water to stop it from cooking. Squeeze it with your hands to remove any excess water. Cut it a few times and put it into a bowl. Mix with 1 teaspoon soy sauce and 1 teaspoon sesame oil. Put it into a large mixing bowl.

3. Put the noodles into the boiling water, cover and cook for 1 minute. Stir them with a wooden spoon so they don’t stick together. Cover and keep cooking for another 7 minutes until the noodles are soft and chewy.

4. Strain and cut them a few times with kitchen scissors. Put the noodles into the large bowl next to the spinach. Add 2 teaspoons sesame oil, 1 teaspoon soy sauce, and 1 teaspoon sugar. Mix well by hand or a wooden spoon. This process will season the noodles and also keep the noodles from sticking to each other.

5. Heat up a skillet over medium high heat. Add 2 teaspoons vegetable oil with the onion, the green onion, and a pinch of salt. Stir-fry about 2 minutes until the onion looks a little translucent. Transfer to the noodle bowl.

6. Heat up the skillet again and add 2 teaspoons vegetable oil. Add the white mushrooms and a pinch of salt. Stir-fry for 2 minutes until softened and a little juicy. Transfer to the noodle bowl.

7. Heat up the skillet and add 1 teaspoon vegetable oil. Add the carrot and stir-fry for 20 seconds. Add the red bell pepper strips and stir-fry another 20 seconds. Transfer to the noodle bowl.

8. Heat up the skillet and add 2 teaspoons vegetable oil. Add the beef and mushroom mixture and stir fry for a few minutes until the beef is no longer pink and the mushrooms are softened and shiny. Transfer to the noodle bowl.

Mix and serve:

  1. Add 1 minced garlic clove, 1 tablespoon soy sauce, 1 tablespoon sugar, ½ teaspoon ground black pepper, and 2 teaspoons of sesame oil to the mixing bowl full of ingredients. Mix all together by hand.
  2. Add the egg garnish and 1 tablespoon sesame seeds. Mix it and transfer it to a large plate and serve. 
Tips: 
  • The best way to save time in preparing and cooking for Japchae is to familiarise yourself with the instructions above and multi-task (e.g. boil two pots of water for spinach and glass noodles at the same time).
  • Japchae can be served hot or cold. You can also microwave it to reheat when necessary.
  • Japchae can be stored in the fridge for 1-2 days in an air tight container. It can be stored for a bit longer but the noodles don’t look as good by then.

Wednesday, January 10, 2018

Spicy Stir-Fried Pork With Korean Crispy Seaweed


With some leftovers of pork neck cuttings, I decided to make this korean stir fried pork for dinner.  It is so easy to prepare and yet it tastes so good especially sprinkles with lots of crispy seaweed over the spicy meat. The cooked meat doesn't look red as I reduce the gochujang paste but added more of the korean hot pepper flakes. The pork neck cut is tender and juicy.  I always ask for this part of the piggy cut when I visit my regular butcher :) She always recommends me the best part of the piggy :p 

This dish is simple to prepare , all I need to do is to marinate the meat with some korean paste and hot pepper flakes, chopped garlic, sesame oil and soy sauce for an hour or at least 30 mins. Stir fry in hot oil till cooked , before dishing up ,sprinkle toasted sesame seeds and korean  crispy seaweed as garnishings.  I prefer the meat to be drier as I wanted to eat the meat wrapped in roasted seaweed squares. If the the meat is coated with gravy, it will soften the seaweed before it can go into the mouth. 


the longer you marinate the meat, the better the taste

Spicy Stir-Fried Pork With Korean Crispy Seaweed

ingredients:

300 g pork neck or tender loin - cut into bite size pieces

Marinade A
1 to 2 tbsp of gochujang paste - I used only 1.5 tbsp
2 tsp of sugar
1 tbsp of soy sauce
1 tbsp of hot pepper flakes (gochu-garu) - if you like it more spicy you can add more
a dash of ground black pepper
2 tsp of sesame oil
5 garlic cloves - minced
1 tsp ginger, minced

1.5 tbsp vegetable oil
1 tbsp of chopped spring onions
* a few tbsp of water if you want the dish to have a bit of gravy

garnishing
korean crispy seaweed
toasted sesame seeds

Korean roasted seaweed sheets (Kimnori -Original Flavor) as wraps

Method:

1.Marinate the meat pieces with Marinade A for an hour or at least 30 mins.

2. Heat up oil in wok, once oil is hot, add in the marinated meat pieces and stir fried till the meat is cooked.  You can add a few tbsp of water if you want the dish to have a bit of gravy.  Once the dish is ready to dish up, add in chopped spring onion and toasted sesame seeds . Give it a quick stir and dish up.

3. You can serve as a side dish or as a main dish.

Note:  I  wrap the meat pieces with the kimnori seaweed squares.   Crispy and delicious !


Friday, February 17, 2017

Korean Cubed Radish Kimchi 깍둑설기 ( Kkakdugi )

Recently, I was recommended to try out the imported radish from Korea by my daughter and she told me that it is sweet and crunchy when eaten raw and that after which I will not want to eat the local ones :) seriously , it is true.  After having eaten it raw, I realised what I have been missing all this while . No wonder the korean loves their radish so much.  Upon her recommendation, I bought one big one from the K mart which sells all korean ingredients and utensils. 

Came home, could not wait to make them into cubed radish or 깍둑설기 ( kkakdugi ) in the korean language.  Making korean side dishes has become a simple task for me, for I have been making them since the day I was introduced to banchan :)  Since the radish is sweet, making banchan would be ideal.

cut them into cubes and seasoned with salt and sugar
after which add in the chilli flakes and mix evenly

add in the radish kimchi base
I prefer to give it character by not blending the ingredients
but chopped them fine

best to ferment them in glass jar

leave it a day in room temp before
storing them in the fridge


Korean Cubed Radish  깍둑설기 ( Kkakdugi ) - adapted from My Korean Kitchen

Ingredients:


1.1 kg Korean radish – rinsed and skin peeled (2.5 pounds), or other variety of white daikon radish 
3 stalks (50 g / 1.8 ounces) green onion – rinsed  
2 Tbsp raw sugar 
2 Tbsp rock salt or Korean coarse salt
 

Radish Kimchi base
1/2 small brown onion (70 g / 2.5 ounces), skin peeled, cut into small pieces to blend 
1/2 small red apple (50 g / 1.8 ounces), seed and core removed, cut into small pieces to blend  
3 Tbsp Korean fish sauce , I used anchovy sauce 
1 Tbsp Minced garlic  
1/2 Tbsp Minced ginger 
4 Tbsp Korean coarse chili flakes (gochugaru)  
1/4 cup water 
1Tbsp rice flour
 

Instructions

  1. Cut the radish into medium sized cubes. (It could be smaller or bigger if that’s what you prefer. Just be mindful that the radish will shrink as they go through the fermentation process.) Put the cubed radish into a large mixing bowl and add the sugar and the salt and mix them well. Leave it for 1 hour at room temperature.
  2. While waiting, chop the green onion into small pieces and make the Kimchi base. Blend the onion and apple with the fish sauce in a blender. (It can take a few minutes as the liquid isn’t as much as the solids.) Make the rice porridge by mixing the water and the rice flour in a bowl and heating them up for 1 min in a microwave. (It could be shorter or longer depending on the output power of your microwave). It should give you a mildly runny porridge texture. Mix all the Kimchi base ingredients (*except for 2 Tbsp of Korean chili flakes) in a medium sized bowl.

  3. After one hour, rinse the radish in cold running water a couple of times and drain any excess water for 5 mins.
  4. Put the radish into a clean mixing bowl and add 2 Tbsp of Korean chili flakes.  Mix the chili flakes with the radish evenly. (By adding this chili flakes separately and earlier than rest of the Kimchi base, you are giving a nice vibrant colour to the radish). Add the chopped green onion and the Kimchi base and mix them evenly and thoroughly.

  5. Move the seasoned radish into an air tight glass container (1.5L glass jar for the above-listed quantity) and leave it at room temperature for between 6 to 24 hours depending on the temperature  After that keep it in the fridge.

Wednesday, December 21, 2016

Baek-kimchi 백김치

This is my first time making Baek-kimchi , literally translated as white kimchi in English . It is not made with hot pepper flakes and gochujang paste, which is why it called white kimchi . And it is a Non spicy kimchi.  It is made with ingredients like chestnuts,jujubes, pine nuts and a whole range of vegetables. I omitted using salted fermented shrimp , so you can call this kimchi a vegetarian Kimchi. It has a lot of fresh flavors , and is incredibly refreshing and colorful too.  A great side dish to serve your family. I have two friends who shared my love for kimchi . After making this white kimchi, I gave them each a tub to try out and I am sure they will love this white kimchi .  Healthy side dish and easy to make too. 

* I did not follow Maangchi style of stuffing the vegetable fillings, I cut the napa cabbage into bite size pieces and arrange them alternately one layer of napa cabbage and one layer of vegetable fillings in a pyrex dish until all the vegetables are used up.

I am a great fan of Maangchi and I love all her recipes , I want to try out each and every one of her korean dishes that she shared on her official website . She always make me drool before sleeps take over :)

the vegetables used are carrots, radish, leeks, spring onions, red chilli and jujube

to ferment the kimchi - blend together korean pear, garlic, onions and ginger 
add the blended seasoning into prepared brine water. Let it sit for 30 mins

 sieve the blended seasoning and brine mixture before adding to the layers of napa cabbage and vegetable fillings

arrange them alternately ,one layer of napa cabbage and one layer of vegetable fillings

once all the vegetables are used up, pour brine 
onto the kimchi till it is all submerged

make sure all the vegetables are submerged in the the brine 

Cover and let it sit at room temperature until it starts fermenting, which should
be 1 1/2 days to 3 days depending on how warm your room is.
Keep an eye on the kimchi  and taste it now and then,
once the brine turns sour, it is fermenting
Keep in fridge and it will slow down the fermenting process.
It can keep for about 1 month. 


Baek-kimchi - Maangchi 's recipe

Ingredients:

1 large napa cabbage
1/3 cup, 1 tbsp plus 2 tsps salt

1/2 pound korean radish ( daikon) cut into matchsticks
1/4 cup carrot, cut into matchsticks
3/4 cup buchu ( Asian chives) cut into 1 inch  * I replaced with leeks and spring onions
3 jujubes, seeded, cut into strips
2 fresh chestnuts, peeled and cut inot thin strips * I ommited
2 tbsp pine nuts * I ommited
1/2 of red bell pepper, cored, seeded and cut into thin strips * I replaced with red chilli

1 medium Korean pear, peeled and cored
4 garlic cloves
1/2 cup onion
1 tsp ginger

Method:

Salt the cabbage
1. Cut the cabbage in half, then cut a slit through the core 2 inches above the stem, so the leaves are loosened but still attached.

2. Rinse the halves under running water, or soak them in a basin for a few seconds until all the leaves are wet.

3. Put the halves in a large basin and sprinkle 1/3 cup of salt evenly between the leaves. Let them sit for 1 1/2 to 2 hours, turning them over every 20 mins.

4. Rinse the cabbage under cold running water a couple of times to get rid of any dirt or salt. Split each half under the running water, to divide the cabbage into quarters.  Cut out the remainder of the core. Drain and set aside.

Make the vegetable fillings:
1. Combine radish, carrot, jujubes, chives, chestnuts and red bell pepper in a bowl. Set aside.

Make seasoning mix for brine
1. Blend pear, garlic, onion and ginger in a food processor until creamy. Set aside.

Make brine:

1. Mix 4 cups of water and 2 tbsp of salt in abowl with a wooden spoon. Stir it well until the salt is thoroughly dissolved.

2. Put the blended seasoning mix into a cotton pouch, or wrap it a couple times in cheesecloth and put it into the bowl of brine. Press it down with a spoon so the delicious blended flavors seep through. Squeeze it a bit and stir the brine for a while. Remove the pouch.

Make the kimchi
1. Spread the vegetable fillings between each leaf of the cabbage. Fold the stuffed cabbage quarters over and put them into a container, glass jar or korean earthenware pot.

2. Pour the brine over the kimchi so its submerged.

3. Cover and let sit at room temperature unti it starts fermenting, which should be between 1 1/2 to 3 days depending on how warm your room is. A warmer room will ferment faster. Just keep an eye o the kimchi and taste it now and then. When the brine turns sour, it is fermenting.

4. Move it to the fridge, which will slow down the fermentation process. It will keep for about 1 month. Serve cold.

Enjoy!


Wednesday, July 20, 2016

Spicy Stuffed Cucumber Kimchi ( Oisobagi kimchi 오이소박이 김치 )


One thing I love about Jaya Grocer is they have things I like which I can't get anywhere else. Imported Australia beef - grain fed..very tender and which are great for my korean dishes :p  Herbs and baking stuff like aluminium free baking powder which I can't get from my usual baking shop. Ok, sorry I have digress again...back on track on this delicious, mouth watering spicy stuffed cucumber kimchi.  I bought 2 packs of mini cucumber from Jaya Grocer ( now you know why my mind trails back to Jaya Grocer that deserved a mention in my blog )  This is not a advertisement post.

I am a great fan of Maangchi and I love most of her recipes and today I am sharing her mouth watering flavor packed side dish or banchan as it is called in Korea - Oisobagi Kimchi which means Spicy Stuffed Cucumber Kimchi. This is a keeper and I can't wait to share with you .... appetizing and easy to make.  A healthy side dish which even my meat eater at home loves it and asked me to make more.  I made a batch and kept them in air tight container, serving them as side dish at every dinner meal.  Try it to believe me :) After a week in the fridge, the cucumbers are still crunchy and the flavors deepen even more...a delightful side dish.

mini cucumbers from Jaya Grocer..fresh and cheap

the stuffings for the mini cucumbers

toasted sesame seeds, while still hot, press hard on the seeds
to release the oil to make it more aromatic

it is fun to stuff the cucumber


I can eat many at one go...so addictive !

this side dish is a keeper...healthy and delicious


Spicy Stuffed Cucumber Kimchi - Maangchi

ingredients:

4 4½ inch long mini cucumbers
2 tbsp salt
1 cup Asian chives - cut into 1/2 inch length
4 cloves garlic - minced
1 medium carrots - cut into thin matchsticks - about 1 cup
1 cup of onions- sliced thinly
1/2 cup hot chilli flakes
3 tbsp fish sauce
1 tbsp sugar
1/4 cup water
1 tbsp toasted sesame seeds

Method:

1.Wash the cucumbers. Make pockets out of them by slicing them twice lengthwise at right angles, ½ inch from one end so the cucumber quarters are still connected to each other at the end.

2.Put them in a big bowl, and sprinkle and rub them with salt inside and out. Let them sit for 10 minutes on the kitchen counter, and then turn them over so they’re evenly salted. Then turn them over and let them sit another 10 minutes.

3.Rinse the cucumbers in cold water a couple of times to remove excess salt. Drain and set aside.

4.Combine buchu (Asian chives), carrot, hot pepper flakes, fish sauce, sugar, and sesame seeds in a large bowl. Mix well with a wooden spoon.

5.Stuff the seasoning paste into the cucumber pockets. If you have sensitive skin, you can wear rubber gloves for this because the paste might irritate your hands.

6.Serve immediately as a side dish for rice, and keep the leftovers in the refrigerator. If you prefer it to be fermented a bit more, let the container sit at room temperature for a couple of days until it smells and tastes sour. Then put it into the fridge. Serve cold.

Tuesday, June 21, 2016

Mung bean sprout side dish (Sukjunamul-muchim: 숙주나물무침)


I homesprouted a bucket of mung beans sprouts after watching Maangchi on youtube.  I am very much inspired by this korean lady :) she can be cute at times and I love her korean dishes that she presented on youtube.  Oh, in case you are a first time here, I love Korean cuisine and love their banchan /side dishes very much. They are  light and easy and healthy too. 

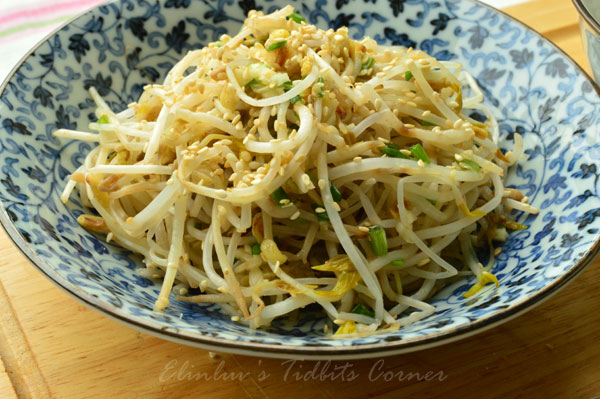
With a bucket full of mung bean sprouts, I took some to make mung bean sprouts omelette some weeks back ( click here for the recipe ) and today I made sukjunamul-muchim with the remaining sprouts.  A light and easy and flavorful side dish.  This is so tasty that I have added them to meal menu :)  

a plate of deliciousness

crushed toasted sesame seeds and spring onions
 adds crunch and flavor to the natural sweetness of the sprouts

my homesprouted mung beans sprouts are tall and thin BUT
they have a crunchy texture when I gave it a quick blanch with hot boiling water

I can have the side dish all to myself
this plate has healthy vegetable protein :)


Mung bean sprout side dish (Sukjunamul-muchim) - adapted from Maangchi

Ingredients:
1 pound mung bean sprouts (or grow your own mung bean sprouts)
2 cloves garlic, minced
2 teaspoon fish sauce
½ teaspoon salt
2 green onions, chopped
1 tablespoon sesame oil
2 teaspoons sesame seeds - toasted

Directions

  1. Bring a large pot of water to a boil.
  2. Blanch the sprouts for 1 minute, stirring with a wooden spoon. Strain them and rinse in cold water in a large bowl for a couple of times. As you rinse them, shake them under the water so the skins fall into the bowl. Put the cleaned sprouts in a basket and strain well. 
  3. Combine garlic, green onion, fish sauce, salt, sesame oil, and sesame seeds in a bowl. Add the sprouts and mix by hand to season evenly.
  4. Transfer them to a serving bowl or plate. Serve warm or cold as a side dish. You can refrigerate them for up to 3 days. 

Vegetarian version

Skip fish sauce and use 1½ teaspoon salt.

Enjoy!